I'm a coffee lover. I have a coffeemaker with a timer on it so that my java is ready in the morning as soon as I step into my kitchen. Believe me, no one wants to be around me before that cup or two is in me.
For those of you who don't own a coffeemaker with a timer....well, all I can say is...you have my sympathy. Maybe this tip will help you to get that first cup a little bit quicker.
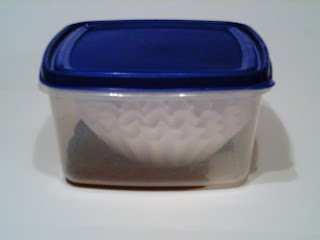
This is what I keep my coffee in. It fits into the drawer that sits below my coffeemaker.
Don't let the emptiness fool you. I have plenty more in the can down in the cabinet.
Take as many filters loose as you have room for in your container. I like to do seven because that means I only have to do this once a week.
Go ahead and put the right amount of coffee into each of the filters. Tamp or shake each of them down to roughly even out the bottoms.
Stack each of them together and put into your container.
Now, all you have to do is take one out and insert it into your coffeemaker. This is especially convenient when you have to continually make more pots of coffee, like unexpected gatherings.
I guarantee that if you start doing this, it will become a habit that you can't live without doing it.
Friday, June 28, 2013
Wednesday, June 26, 2013
Upcoming Wedding
This is my beautiful daughter and her husband-to-be (never have like the word fiance').
As you can see, she is getting married in less than three weeks. It's going to be a nautical themed wedding that will be held overlooking the reservoir. Simple but elegant.
I just wanted to share my happiness with you. Please feel free to leave well wishing comments for the couple.
As you can see, she is getting married in less than three weeks. It's going to be a nautical themed wedding that will be held overlooking the reservoir. Simple but elegant.
I just wanted to share my happiness with you. Please feel free to leave well wishing comments for the couple.
Saturday, June 1, 2013
Quilling Strips Storage
Lately, I've gotten into quilling. I've shared some of my creations at Frosty Festivities, Star Ornament, and Quilled Word.
For my quilling, I use scrap paper and cut my strips myself. I knew I needed a way to store my quilling strips, so I designed and made a storage box.
With this, I can keep my colors separated easily. It has 28 compartments, and it's very easy to get my chosen color out of. All I have to do is slide my finger inside and pull the compartment totally out. Or just leave it on it's side and slide a strip or two out at a time.
This was my former storage. Convenient for on-the-go, but not organized at all. And very hard to work out of.
The box frame is just a chosen cereal box. First, I cut the top off. Since I was using regular paper width, the box was still too tall, so I cut about two inches off the top
Using scrap paper, I cut 3½" strips (width-wise).
My paper cutter has ½" scoring lines. Using those, I scored at ½, 1, ½, 1, and ½. I came back and followed the lines using a black marker so you can see them.
I then folded on those lines to create a rectangle. The two outside edges glue together. This is the same technique I used on the Quilled Word Frame.
I kept making these until I filled the box. It took 28.
This is my pile of scrap papers waiting to be cut into strips. I've been collecting them all through the school year.
Best trash ever!
A few strips cut and sorted into colors.
I thought I would make the box more presentable so I just wrapped it with a scrap piece of wrapping paper.
Another project finished and totally made with recycling materials. Whadaya think?
Subscribe to:
Posts (Atom)


